Inform the reader how to properly free up space in the IQmark Diagnostic Workstation database by archiving holter reports.
Archive Holter Reports:
Note: This procedure will remove the selected reports from the database. It is strongly recommended to backup the existing database before performing the procedure.
With the Workstation software open, click on 'Patient List'. Select 'Go To Report List Screen', button is located at the bottom of the screen.
Set 'Show Reports' filter to only display Holter reports.
Highlight the desired reports to archive.
Important Note: Archive no more then 10 reports at a time.
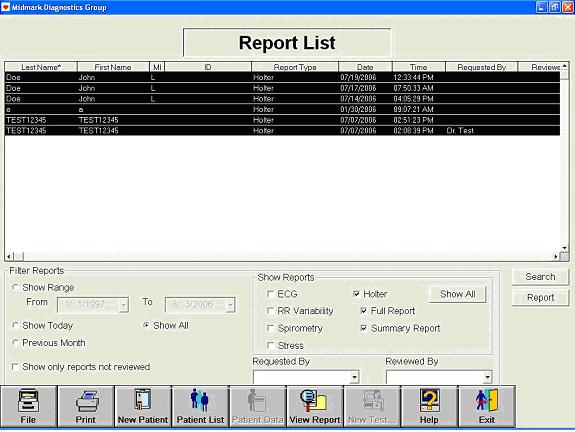
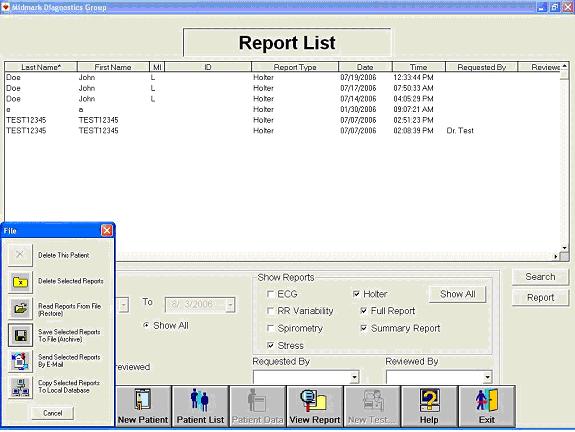
Select the 'File' button at the bottom left corner of the screen.
Select the 'Save Selected Reports to File (Archive)' button.
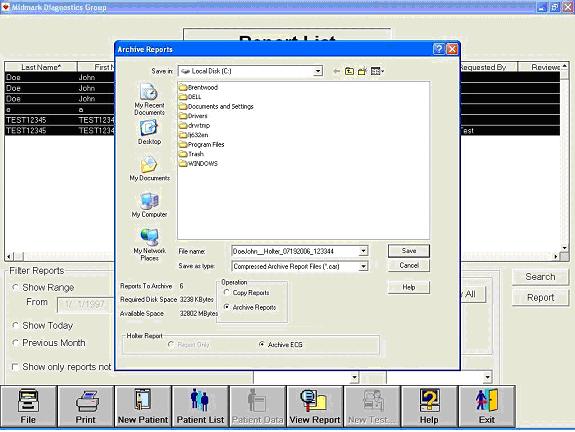
Specify a location where to archive the Holter reports.
Select the 'Archive Reports' radio button in the 'Operations' box.
Select the 'Save' button.
After the 'Save' button is pressed. The reports will be transferred to the location specified.
Note: The following procedure is only for MS Access Databases
After archiving reports out of the database, it is required that the database is compacted. This will clean up and resize the database to a smaller size.
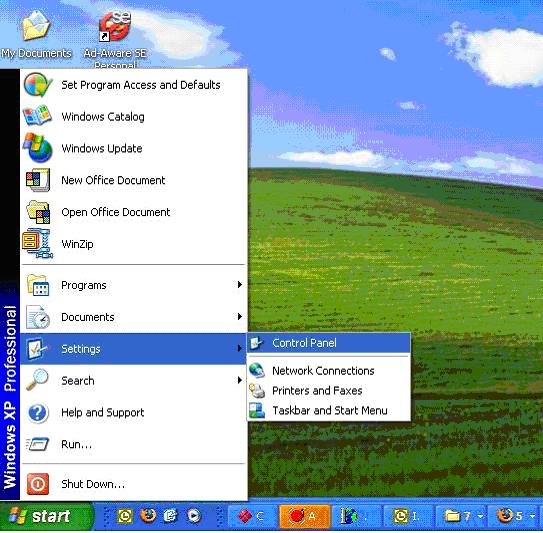
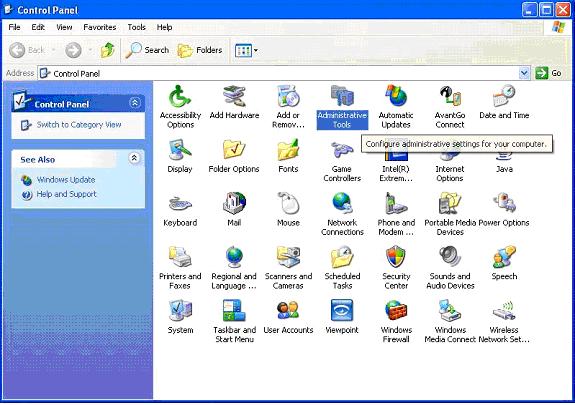
Click on 'Start' and then open 'Control Panel, maybe located under 'Settings'.
If the new window states 'Pick a Category', go to the left hand column and select 'Switch to Classic View'. (This step is only for Windows XP users)
Select and open 'Administrative Tools'.
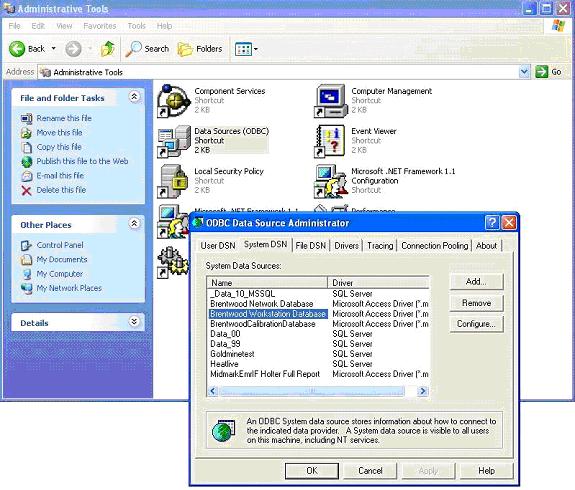
Select and open 'Data Sources (ODBC)'.
Select either the 'User DSN' or 'System DSN' tab and look for an entry named 'Brentwood Workstation Database'. If a network database is being utilized, look for an entry named 'Brentwood Network Database'.
To identify if a network database is being utilized perform the following steps:
Open the IQmark Diagnostic Workstation software
Next to the 'Configuration' button, the software will state one of the following:
'Local'
A local database is being used to store the files and the 'Brentwood Workstation Database' will need to be backed up.
'Network'
A network database is being used to store the files and the 'Brentwood Network Database' will need to be backed up.
Highlight the entry and select the 'Configure' button.
Select the 'Compact' button and select the 'OK' button for the next two windows.
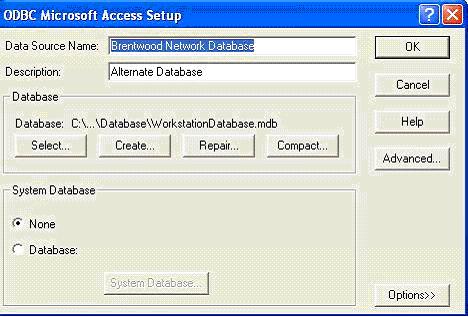
A message will pop up asking to replace the old database. Select 'Yes' to proceed with the procedure.

A message will pop up once the compact is complete. Select 'OK' to finish compacting.
